After several years of use, the ear pads on my Yamaha CM500 headset dried out and began to flake. My wife wondered what the black stuff was behind my ears!
When I heard about the hassle of replacing a pad with its skirt trapped in a slot around the headphone, I decided it would be simpler to glue a generic pad to the face of the headphone.
I bought a pair of pads on eBay for about six dollars. The eBay description was "Pair 100MM Ear Pad Replacement Ear Pads Cushion For Headphones 4 Inches 10CM."

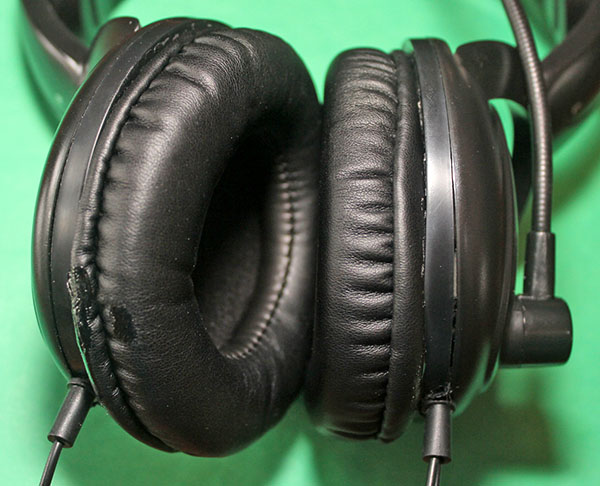
This page shows how I replaced the pads on my CM500. It has oval headphones, but the round replacement pads fit well.
The original pads have a skirt that wraps around the headphone housing, and is trapped in a slot. Rather than attempting to disassemble the headphones to remove the skirt, and then try to make the new pad's skirt fit, I decided to pull the old pad's skirt loose, then glue the new pad's skirt directly onto the headphone surface. This photo shows me removing the old pad's skirt.
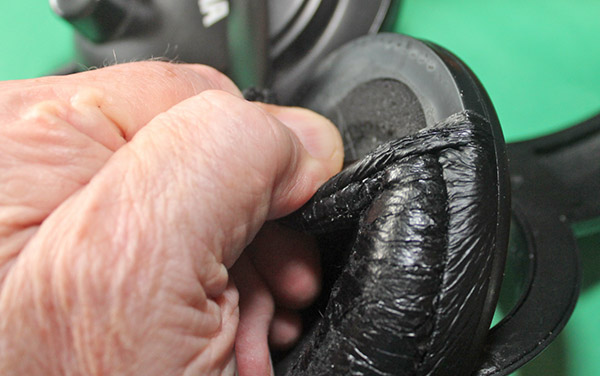
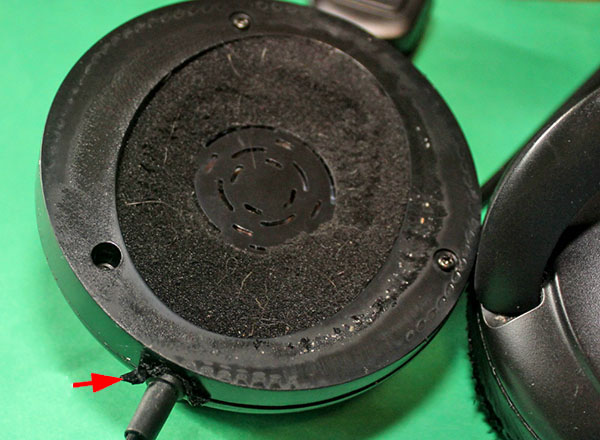
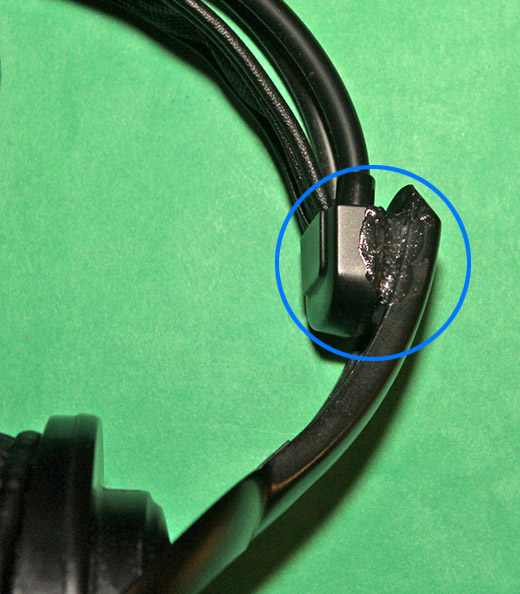
The cable into the headphone runs through a hole in the old pad's skirt, so the skirt must be cut from around the cable. See the red arrow in in the next photo.
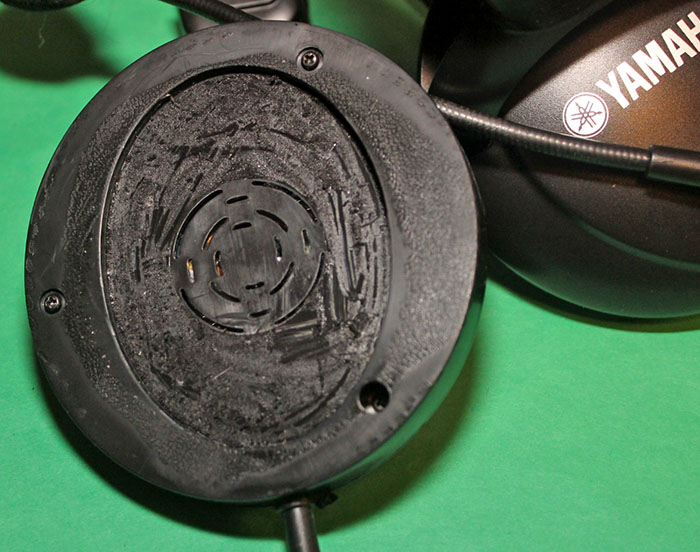
Notice that the thin layer of foam covering the headphone has deteriorated. This type of foam commonly becomes gummy and falls apart over time.
I used a pocket knife to scrape the rotten foam from the headphones. Bert N4CW discovered double-sided tape holding the foam on his CM500, and he just lifted an edge and peeled it off, with no knife-scraping required.
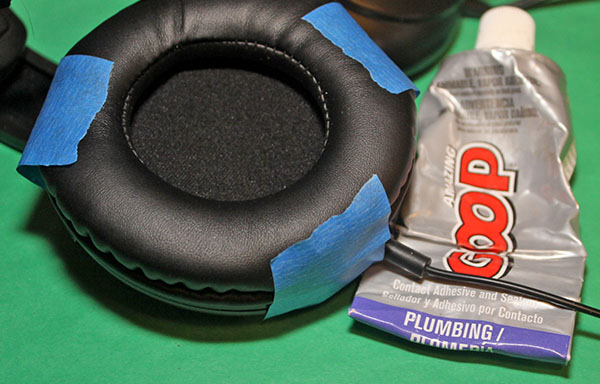
I spread a thin coat of Amazing Goop, a viscous adhesive, on the new pad's skirt, and pressed it onto the headphone's flat surface, then taped it to ensure a secure joint.
And that's it. I glued the pads offset slightly below center so they would fit comfortably around my ears with the headset sitting on top of my head.
If the new pads eventually need replacing, they can be removed by pulling to peel off the Goop. (I did this after discovering that centered pads didn't fit my ears well, so I removed them and re-glued them lower.)
When I tried on the headphones, I discovered that the headband must be fully extended for the pads to fit comfortably over my ears. To avoid having to adjust the headband each time I put them on, I applied a dollop of Goop to the adjustment ratchet at each end of the headband. Now the phones aren't adjustable, but since I'm the only person wearing them…. (If ever I need to make the headband adjustable again, the Goop peels right off.)
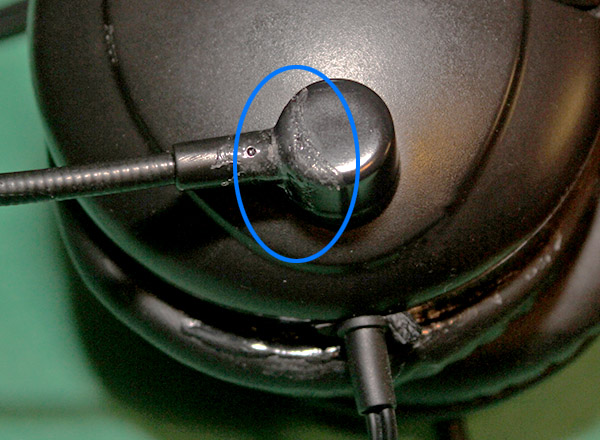
The second Goop tweak solved a problem caused by the microphone boom not fitting tightly into its pivot fitting. If I moved my head while speaking, the boom shifted and produced a faint "clunk" in the transmitted audio.
Even the slight movement of my left temple while speaking caused a clunk. Naturally, this occurred while I was recording messages for contests, so messages often began with a faint clunk – that had to stop.
I applied Goop around the joint between the boom and the pivot. Problem solved – no more clunks!
Updated April 18, 2025