K • POD Tweaks
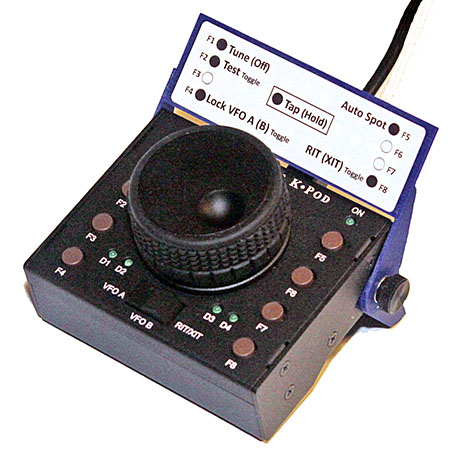
The Elecraft K • POD remote control is a welcome accessory for my K4D transceiver. Early-on I found I needed a reminder of which functions are assigned to its eight programmable buttons. Also, the stand tilts it too high for my taste. If I swivel the stand all the way toward the front, the tilt is less, but then the K • POD rocks when I press the upper four buttons, and when I rotate the knob using the finger dimple.
So I used my 3D printer to tweak the K • POD. I printed a shortened stand and a holder for a label to show me which functions I've assigned to the buttons..
The Short Stand
I designed and printed a short stand. The plastic material is the same thickness as the original metal so the ears are flush with the K • POD case, and the original factory non-skid feet slip right on. Now my K • POD is tilted just right.
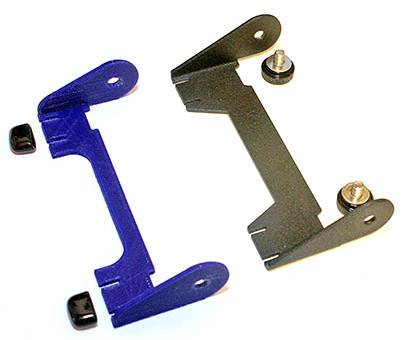
Note: These two photos show a blue prototypes of the label holder and stand. I now print these only in black, to match the K • POD's case.
The Label holder
The K • POD's programmable pushbuttons are a great feature, but sometimes I don't remember which one to press for a particular function. I had already designed a short stand, so I morphed that into a holder for a self-adhesive label.
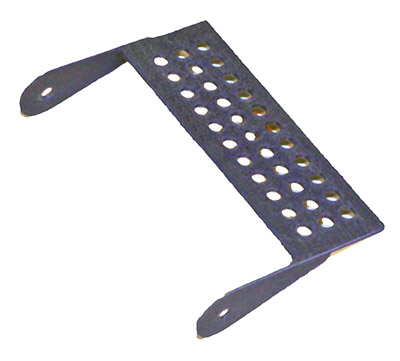
My Brother QL-570 label printer (replaced by the QL-800) can print DK-1201 1" x 3½" address labels, and the K • POD is about the same width. The label holder arms are spaced so they fit over the stand's arms, and thin enough to use the original thumb screws.
Installation Instructions
Here's how to install the short stand and the label holder on your K • POD.
-
Remove the two thumb screws holding the factory stand to the K • POD. Keep the flat washers.
-
If you don't want to replace the factory stand, skip the next four steps.
- Note the orientation of the factory stand, and remove it.
- Test-fit the 3D-printed stand. If it doesn't slide on easily, use a sharp knife or sandpaper to remove any excess plastic that prevents an easy fit.
- Remove the soft plastic anti-skid feet from the factory stand, and attach them to the 3D-printed stand. Push them on carefully to avoid breaking the plastic stand.
- Attach the short stand to the K • POD using the original thumb screws and flat washers.
-
The label holder's arms fit over the stand arms. They are thin enough so the factory thumb screws can be used to attach the holder and the stand.
-
Remove the thumb screws and washers, and slide the label holder's arms over the stand arms. The arms project behind the holder.
-
If it doesn't slide on easily, use a sharp knife or sandpaper to remove any excess plastic. Work carefully, as the thin arms can break off.
-
With the label holder in place, secure both its arms and both the stand's arms with the thumb screws and flat washers. If your thumb screws are too short to catch a thread, discard the flat washers. Mine were long enough to keep the washers.
-
Adjust the stand and the label holder as desired, then tighten the thumb screws.
-
Apply a self-adhesive label to the holder, and use a permanent fine-tip marker to label your K • POD button assignments.
-
If it's necessary to remove the label, grasp the holder to prevent it breaking, then peel off the label starting at one corner. If the label resists, apply naphtha (lighter fluid) through the holes in the holder to loosen the adhesive. Naphtha also will clean adhesive residue from the holder. Do not use acetone or lacquer thinner, as these will dissolve the plastic.
Updated
April 20, 2025


